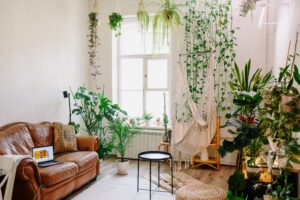
Indoor plants add color, texture and warmth to the home. They allow year-round access to gardening and can even improve air quality. Many houseplants are easy to grow, but they must be given appropriate care in order to thrive. Since your plants were probably started in a greenhouse — grown under ideal conditions — moving them into your home takes a bit of adjustment on their part.
Proper watering and lighting are the most important components of indoor plant care, but humidity and temperatures also play a role. The trick is to try to mimic the climate of the place that plant came from.
Tropical plants thrive in warm, humid environments, while cacti and succulents prefer hot, dry climes. Of course, your home can’t be everything to every plant, but you can take plant needs into consideration when choosing plants. And, with a few tricks, you can convince your green friends that they are living in their ideal environment.
With the right equipment, growing beautiful house plants is easy! At Planet Natural we have everything you need: pots, soils and fertilizers to get started, plus grow lights to bring the green-giving magic of the sun indoors. Now, let’s grow!
Plant Selection
Next ask yourself if you are looking for a plant with beautiful green leaves or would prefer a flowering plant. Some flowering houseplants are seasonal while others will bloom year after year (see
Top Choices for Easy Care Flowering Houseplants).
A third consideration is how much time you can devote to a particular plant. A spider plant will take almost any amount of care (or neglect), while an orchid requires significant tender, loving care.
Indoor Plant Care
Water
Potting soil should be kept moist, but not wet. Of course, there are always exceptions —
succulents, and other thick-leafed plants do best when the soil dries out between watering. If the soil is kept too dry or too damp the plant’s roots will begin to die, which can lead to inadequate growth or even death of the plant.
There are several methods to determine when a plant needs water. If the potting soil becomes lighter in color or cracked, it’s probably time to water. Pick up your plant and gauge the weight after watering. After a few practice lifts, you’ll be able to tell if the plant needs water just by picking it up. Of course, you can always stick a finger in the soil to determine how moist it is below the surface. For large plants, a hand-held moisture meter may be your best bet to determine how much water is present around the plant’s root mass.
Dehydration
Do NOT let plants get to the point where they are wilting or the soil is pulling away from the edge of the container. These symptoms indicate dehydration and at this point the plant is already seriously stressed and the roots may be damaged.
Signs of underwatering include:
- Slow leaf growth
- Translucent leaves
- Premature dropping of flowers or leaves
- Brown, yellow or curled leaf edges
Overwatering
Too much water is just as detrimental as too little. Frequent watering forces air from the soil and opens the door for root-killing bacteria and fungus to move in. Overwatering is the number one killer of houseplants.
- Signs of overwatering include:
- Fungus or mold on the soil surface
- Mushy brown (maybe stinky) roots at the bottom of the pot
- Standing water in the bottom of the container
- Young and old leaves falling off at the same time
- Leaves with brown rotten patches
|
Watering on Demand
|
| Plants requiring more water |
Plants requiring less water |
| – Flowering plants
– Plants potted in clay pots
– Plants grown in small pots
– Actively growing plants
– Plants located in direct sunlight
– Large-leaved or thin-leaved plants
– Plants that are native to wet areas. |
– Resting or dormant plants
– Recently repotted plant
– Plants grown in high humidity
– A plant located in a cool room
– Plants potted in non-porous containers
– Plants with thick or rubbery leaves
– Plants grown in a water retentive mix |
For those who are too busy to keep up with a regular watering schedule, which requires checking individual plants every 3-4 days, there are several
self-watering devices available. A moisture wick draws water from a dish of water into the root ball of your plant. Capillary mats and moisture tents also keep plants watered. You can always make your own
self-watering plant container out of a 2-liter pop bottle.
Water Quality
Room temperature tap water should be fine for most indoor plants, even if there is chlorine or fluoride added to your city’s water. Plants especially love rainwater or melted snow (unless you live in a region with acid rain). Avoid continuous use of softened water, which may contain sodium.
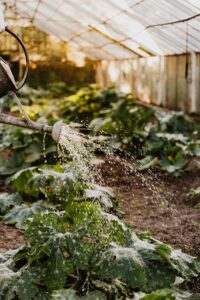
How to Water
Plants can be watered from the top down or bottom up. When watering from the top, try not to wet the foliage, while ensuring the entire soil mass is moistened. Water should be coming out of the drainage holes in the bottom of the pot.
If you prefer to let your plants do the work, set the plant in a dish of water and the roots (and capillary action in the soil) will pull up whatever they need. This method, known as bottom-watering, is a more thorough, if time-consuming, way to water plants.
Tip: Be sure to dump any standing water from the saucer one hour after watering.
Drainage
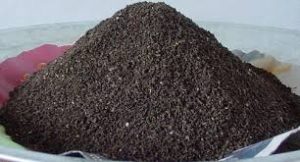
Good drainage is essential to healthy houseplants. Start with a good,
organic potting soil (not regular soil) that has been mixed specifically for indoor gardening.
Choose a container with drainage holes, or put a layer of pebbles in the bottom of a container without holes. The point is to not let the plant stand in water. From time to time, check that the drainage holes have not been clogged. And always empty standing water (don’t run it back through the plant’s soil).
Light
As with watering, every plant has different light requirements. Many plants prefer direct sunlight, but this may be hard to get inside a house. Placing a plant in a window might offer enough light, but some houseplants will need supplementing from a grow light (see
Lighting Indoor Houseplants).
Flowering Plants
Flowering plants generally do best in moderately bright light and for this reason windows located on the south, east or west side of the house are best for potted flowering plants.
Foliage Plants
Foliage plants can be divided into three categories: those requiring low light, moderate light and high light.
A dimly lit room should suffice for those few plants willing to survive in low light areas. Moderate light-needing plants will prefer a north-facing window, light diffused through a thin curtain or daylight without direct sun. Indoor plants that prefer high light will need to be in a south-facing window or under a grow light.
Some plants will benefit from being moved outside in the summer to get a little extra light. Read about
Moving Plants Indoors & Outdoors here.
Temperature
Many houseplants thrive in temperatures between 65-75° during the day and 55-60° at night. Of course, temperature preferences vary from plant to plant with tropical plants liking temperatures around 90° (or higher) and other plants growing better in cooler temperatures.
Humidity
Most plants thrive in high humidity — around 80%. Unfortunately, most homes are much drier, especially in the winter when forced heat can even further drop the humidity.
Using a humidifier can help, but there are other ways to increase the moisture in the air near your plants. A small tray containing pebbles and water can boost local humidity as can grouping plants more closely together. Daily misting of the plant’s leaves can help as well. For some plants, such as gardenias and orchids, keeping them in a bathroom or the kitchen (both usually have a higher humidity) can help.
Fertilizer
Every time a plant is watered nutrients leach out of the soil. Even if that didn’t happen, plants would quickly deplete the nutrients in their soil. Unlike plants living outside, houseplants don’t have a regular source of nutrient replenishment unless you fertilize them regularly. (Newly purchased plants have been heavily fertilized in the greenhouse and can wait a few weeks before getting started on a fertilizing regime.
Fertilize once a month when plants are flowering or growing. During the winter, when plants are dormant or generally not growing much, fertilizer can be withheld.
If a plant is dropping its lower leaves, showing weak growth or an overall yellow-green color, it may need more fertilizer. It might also need more light or less water, so take the time to analyze all conditions before pouring on more plant food. Adding fertilizer when a plant does not need it can be worse than doing nothing at all.
Tip: If a plant is wilted, water well first then apply a fertilizer later — after it has recovered.
Fertilizer Types
Choose an organic fertilizer specific to houseplants and read the instructions carefully. While
natural fertilizers are less likely to burn or harm your plants than a synthetic fertilizer, it is important to apply the correct amount. In general, plants grown in low light will not require as much fertilizer as plants grown outside or in bright light.

To start, use about 1/4 the amount of fertilizer recommended on the label once a month. Then, if overall plant color becomes lighter, increase fertilizer applications to every 2 weeks. On the other hand, if the new growth is dark green, but the leaves are small and the space between the leaves seems longer than on the older growth, fertilize less often.
Tip: Soluble salts from synthetic fertilizers can build up over time and create a crusty layer of salt deposits on the soil surface. Remove this layer and leach the soil every 4-6 weeks with generous amounts of water to help avoid toxic salt build up. Excessive salts can damage roots and make the plant more susceptible to disease and insect attack.
Repotting
If your plants are thriving and growing the way you want them to, eventually they will need a bigger pot — or some fresh potting mix. Repot plants in the spring when they are just starting to grow. Vigorous root growth will allow the plant to adjust to its new container quickly.
When it comes time to repot, choose an organic soilless medium made specifically for potting houseplants (maybe even specific to your species of houseplant). There are many to chose from, or you can make your own.
Choose a pot that is bigger than the current container, but not huge. A pot that is too-big can encourage root rot and other problems because the soil will remain wet for days, or even weeks before it can be used by the plant.
Take care with the root system when repotting to avoid damage. Carefully firm the soil around the root ball without compacting the soil. Leave enough space at the top of the new container for water and water thoroughly. (Click on
Repotting Houseplants for step-by-step instructions.)